Showing posts with label tutorials. Show all posts

Thursday, July 11, 2013

skate leash tutorial

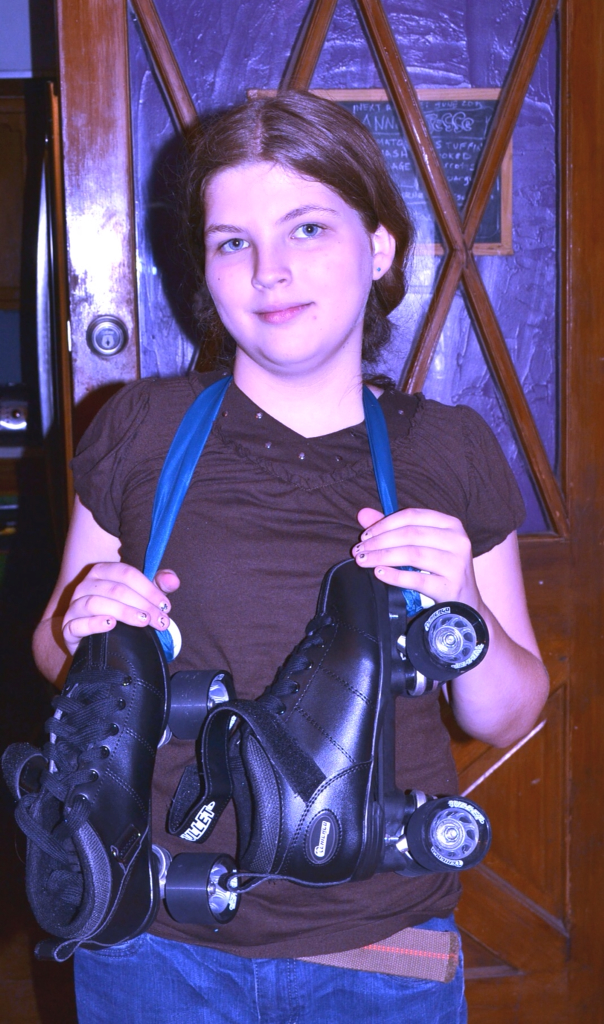
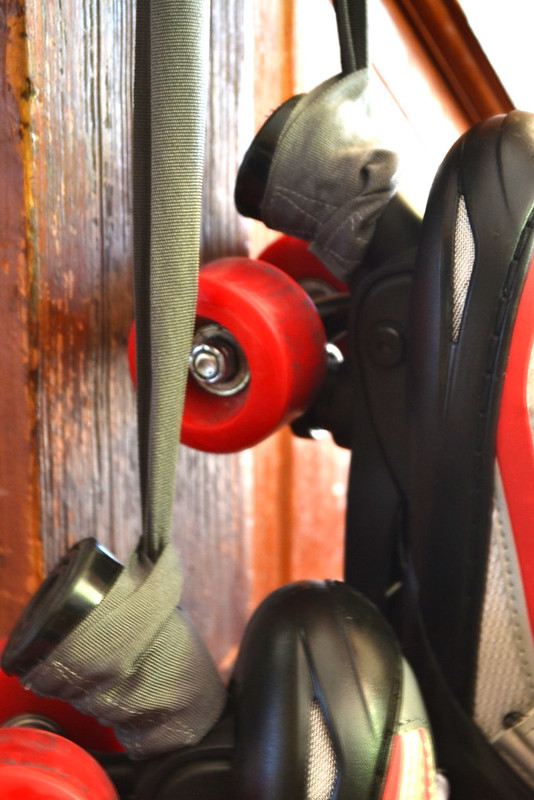
As I mentioned previously, a skate leash is a handy way of keeping
roller or inline skates tethered together for hauling around or hanging up.
The pictures in this tutorial show my kids sewing up their own skate
leashes in about ten minutes -- it's that easy!
 
Start with a strap of some kind which can be doubled up and still
pass through your sewing machine. The instructions that follow refer
to grosgrain ribbon, sewn with regular poly/cotton sewing thread
and a #14 sewing machine needle.
 
1) Cut strap to 48" length (if this skate leash is for a small child, you may wish
to adjust this down -- my seven-year-old prefers a 36" starting length).
 
2) Starting on one end, iron the ribbon under about 1/2".

2) Fold the ribbon under again, this time another 3 inches.
3) Press.
4) Using your presser foot as a guide, sew down the ribbon at the
3" fold. Secure this end of the loop with a small rectangle of stitches
and then an "x" criss-crossing the rectangle. This encases the frayed ends
of the ribbon and strengthens the loop. Trim loose strings. Iron one more time.
Your ribbon end should look something like this.
5) Repeat steps 2-5 with the other end of the strap, making sure
you are folding the ends under to the same side of the ribbon as before.
6) Your skate leash is complete! Pull the ribbon strap partially
through one end to form a loop.
Repeat with the other end as well.
7) Position the loop you just made over part of the skate --
the toe stop, the front wheels, or the boot itself. Pull to tighten.
The other end attaches to the other skate, and you are ready to go!


Thursday, June 28, 2012

how to: remove rub-on decals from furniture

Hi, folks! Once we returned from vacation and moved into my parents'
house (where we'll be staying for the duration of our sabbatical), one of the
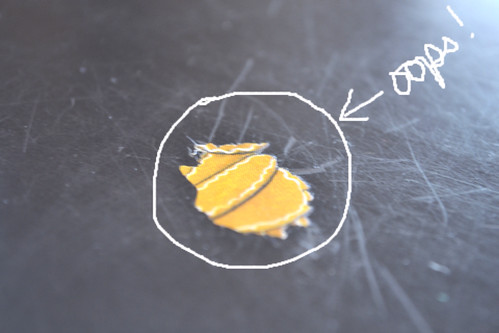
first things that happened was my son permanantly applying a rub-on
decal to the kitchen table. Aack! As you can see from the photo above,
he did a bit of scraping before I caught wind of the event. This thing was
not going to budge. I managed to stop him before he started whipping out
metal-tipped instruments to gauge out the top layer of wood on my mom's table.
Then I did some research. Here's what I found:
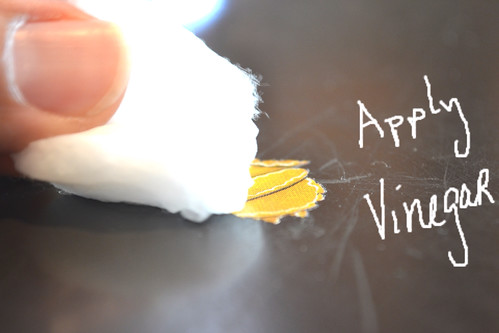
To remove rub-on decals from furniture, first apply white vinegar.
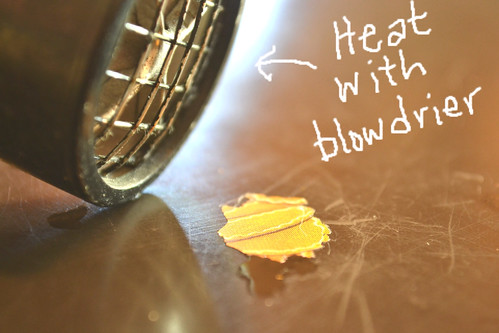
Use a blowdrier to warm the decal. The heat should be set on high
so that it warms up quickly. You'll notice the vinegar puddle shrinking.
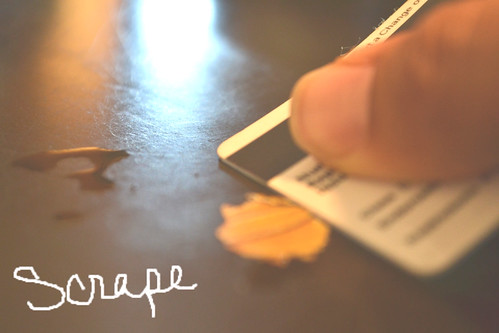
Scrape the edges of the decal with a credit card or driver's license.
This may scratch a bit, but it is more gentle than any pointy object.
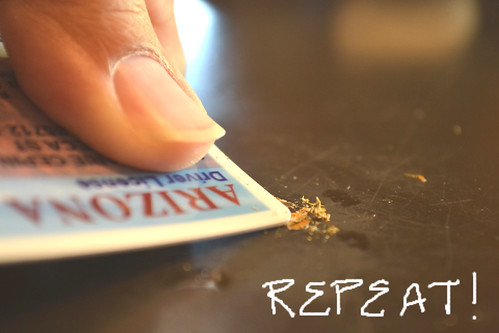
Dab, heat, and scrape repeatedly until the decal is removed.
You'll notice that I moved to the corner of my card to aim at the last stubborn bits.
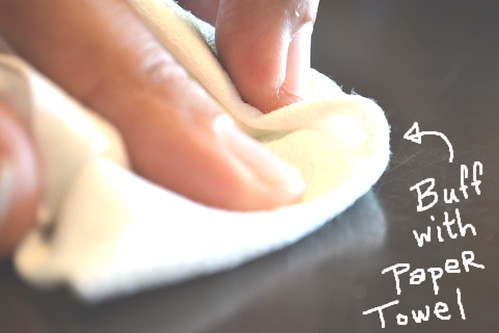
Use a dry paper towel to wipe off any remaining adhesive.
Buff the surface to smooth out any scratch marks.
And there you go! I can still see the spot because it's a bit more
scratchy than before (and because I know about it).
It's similar to other parts of the table, though. And way better than
if we'd gone at it with nail polish remover or a scrubby sponge!

Saturday, October 9, 2010

on scripture memory


As I mentioned a while back, I've been enjoying the side effects
of scripture memory lately. This got me to thinking about what
I think are the main reasons to memorize a larger chunk of the Bible, how I've
failed at this before, and why it's going so swimmingly this time around.

Since I believe that the Bible is the most clear and direct way that God,
through his Holy Spirit, communicates with us, I have to think that
becoming thoroughly acquainted with it is vital. The Bible is a large
book, however, and daunting. It is also consistent and cohesive. So
the best way I've found to become familiar with it is to take a large
section and stick the whole thing in my brain. As I repeatedly review the
different parts of that section, I discover unexpected connections,
repeated words, and continuing themes which I had never before
(even with prolonged study) noticed. Further, I have found that as I
roll the words around in my mind, I recognize how they might
inform the events and conversations that are current in my life. I hear
God speak to me and to my friends. I'm able to directly quote what He
is saying to us. Finally, I find that as I pray, truths about God and what's
on his heart come bursting to the forefront from these words put
to memory. I experience communing with God in a whole new way as I
hear, speak, and respond to these words.
 
In the past, I've attempted to  memorize both small and large passages
of the Bible without a great deal of success. I have a bunch of random
verses tucked away in various pockets of my brain with no references
attached. I also once had the first seven chapters of the book of John
down, most of which have since disappeared.

This time around, however, it's falling into place more easily. Based on
this recent experience of memorizing Ephesians (I'm almost done --
half a chapter to go!), here are my suggestions:
  • Memorize with a friend.
Hannah and I review whatever we're each working on regularly.
We're both using slightly different translations and at our own
pace, so it's kind of like we're memorizing something completely
different. That's fine. We just each bring a copy for the other
person to look at while we review. We may only run through a
paragraph every once in a while, or a whole chapter once a month.
But having someone else actually look at the words and catch
mistakes that are getting ingrained is essential. Also motivating.
My kids think it's a great game to quiz me on paragraphs in the
car -- even Elliott, who can't read yet (he finds all the 'ands' and
'the's' and points them out). Sometimes I quote it to them to lull
them to sleep at night.
  •  Don't memorize all the reference numbers.
My biggest hangup with memorizing the Bible is trying to get all
those numbers down. So I say, get rid of them! If you've ever read
the Bible before, you may have noticed that each page is full of
little numbers around the text. These handy little add-ons were
assigned long after the Bible was written, and they help people find
what they're looking for, talk about them with other people, and
those kinds of things. However, they are not what I'm interested
in memorizing. They have no internal meaning, so remembering
them along with the text is plain unwieldy. This time I chucked
most of the numbers and am working by chapter and paragraph only.
  •  Break it down into paragraphs.
As I just mentioned, I think paragraphs are the way to go.
As I memorize & review, I start by stating the chapter and paragraph
I'm working on: "Ephesians 4, paragraph 3" for example. This helps
keep all the parts in order.
  • Use a friendly translation.
I've found that the New Living Translation is a lot more direct
and less wordy than some other versions of the Bible. This makes it
easier to memorize, simply because there are fewer words on the page.
It is also broken down into smaller paragraphs, so the whole
paragraph approach works more readily.
  • Have a master copy/format that you always go back to.
When memorizing a bunch of words and sentences, there has to
be a consistent visual framework to support them until they are
in place. I like to go online to a place like biblegateway.com,
copy the whole text into a word document and format it into a clear
layout with paragraphs numbered and one chapter to a page if possible.
Then the words and paragraphs are always at the same spot on the page.
  • Put each paragraph on a 3x5 card.
To break it down further, each paragraph can go on an index card.
The index card for the section you are working on can go with you
wherever you are. Tuck it in your pocket, post it on the bathroom
mirror, put it in the windowsill or on your dashboard. After I have
this particular paragraph memorized, it will go in an index card holder
with all the other cards. Write the chapter & paragraph numbers on the
back, and you have flash cards. Then you can review contextually (the
whole chapter) or randomly.
  • Make mini-deadlines.
I'm aiming for a chapter (oops!) a paragraph a week generally, although I take
weeks off for review if things seem to be getting shaky. No hurry here, but if you
let go of the whole thing for too long, it starts disappearing!
  • Review often!
Developing a habit of memory and review while cleaning or driving, or
as the first thing you do when there's a bit of free time helps the whole
thing come together and stay in place while it becomes firmly rooted.

Whew! That took forever to write and probably even longer to read.
I've been really encouraged by this process, though, and maybe you will be too!
Wednesday, June 2, 2010

cape tutorial

Here's a tutorial for how to sew a costume cape. 
It can be adjusted to fit children or adults of any size 
and features a velcro neck closure for safety.   
Enjoy!    

Step 1: Select Fabric
If you're going for the superhero look,
you'll want something shiny like satin.
Anything else would do, though!
Measure from shoulder to floor to 
determine length of cape fabric.
Round up to the nearest 1/4 yard
and add 1/3 yard for cutting yardage.
This will allow enough fabric for squaring
the edges and creating a neck band.

Step 2: Measure Neck
Add 5 inches for seam allowances
and closure attachments.
This will be the length of the neck band.

Step 3: Cut Cape Rectangle
Use the selvedges as the side edges of the cape.
Cut a strip the length of the measurement (step 1) from 
neck to floor. For this example, I used 34 inches.

Step 4: Cut Neck Band
Cut a strip of fabric 3 inches wide by the number
of inches calculated in step 2.

Step 5: Cut Interfacing
Cut a strip of interfacing roughly the same size
as the neck band.

Step 6: Iron Interfacing to Neck Band
Make sure to iron the interfacing to the 
Wrong Side of the neck band. 
On satins, this will be the less shiny side.
Set neck band aside.

Step 7: Iron Sides (selvedges) Under 1/4"
Take care when ironing. The iron should be 
set to "synthetics" if satin is in use so as not
to scorch the material. Mine, however, changed color
when hot and then returned to normal on cooling.

Step 8: Roll and Sew
Turn the ironed edge under once more
and hold in place while sewing down this
hem. Use a scant 1/4" seam.

Step 9: Sew Under Bottom Hem
Follow steps 7 & 8 to iron and sew
the hem at the bottom of the cape.
Fold the ends under at an angle 
for mitered corners.
Step 10: Gather Top Edge 
Choosing a long stitch, baste across the raw
fabric along the top, about 3/8" from edge.
Leave threads long on both ends.

Grasp the front thread on one end and 
gently pull on it while pushing fabric 
toward the center of the cape. This will 
gather fabric to fit the neck band. Repeat
with the front thread on the other end.

Step 11: Arrange Gathered Edge
Spread gather evenly across top edge. 
Adjust to fit across center of neck band.

Step 12: Pin Cape to Neck Band
Align top edge of cape with a long edge
of the neck band, Right Sides Together.
Gathered edge of cape should be 3-4 inches
in from ends of neck band and roughly centered.

Step 13: Sew Cape to Neck Band 
Baste cape to neck band with 1/4" seam allowance.
Reduce stitch length and sew through gathered
edge and neck band again at a 1/2" seam allowance.

Step 14: Fold Down Top Edge of Neck Band
Iron down at 3/8" to crease, then unfold.
Now fold in the opposite direction so that 
right sides are together and the long top and
bottom edges are aligned.

Step 15: Sew Short Ends of Neck Band
Sew a 1/4" seam along the short ends of neck
band. Turn the corner and sew toward the 
gathered cape, stopping about an inch away.

Step 16: Turn Neck Band Right Side Out
Push corners square by pressing 
scissors, bone folder, or other sharpish
object into the corners.

Step 17: Top Stitch Neck Band 
Sew a 1/8" top stitch to close the neck band
over the gathered cape. Continue this top stitch
all the way around the four edges of the neck band.

Step 18: Attach Velcro
Cut 2-3 inches of 1" wide hook and eye tape.
Sew the soft tape on the front side of 
one end of the neck band and the rough tape on
the back side of the other end of the neck band
so that they attach when overlapped. 
Sew with a 1/8" seam allowance all the way
around the four edges of the velcro.

Step 19: Trim Loose Threads
Look over cape and trim any remaining threads.

Step 20: Put On Cape
It's time to rule the world!!!


Tuesday, January 19, 2010

index tab tutorial

As promised yesterday, here's a tutorial
for making your own index tabs!!


Step 1: Select Paper.
I prefer cardstock, because it's weighty
enough to not get all bent up. However,
be careful to choose a color that's not
too dark to write on (unless you have a
white pen handy) and that's not so busy
that you can't see what you've written.


Step 2: Choose Width.
I prefer 2 inch wide labels, because
they're big enough to write a couple
of words on. However, tiny tabs (1/2")
work, as do mediumish ones (1 inch).
Once the tabs get below an inch, it gets
hard to curve the corners. So plan on
sticking with square corners if you go
for tiny tabs. You could even measure
the height of your book and divide it
by the number of tabs you need. Use the
answer as the width of the tabs. Then
you can have them neatly lined up from
top to bottom!


Step 3: Cut Strips.
As I mentioned, 2 inches wide is
recommended. These are very forgiving
little guys, though. Most anything will do.


Here are my strips, in 2 inch widths,
1 inch, and 1/2 an inch (from left to right).


Step 4: Cut Rectangles From Strips.
The height of the rectangles should be
1.5 inches. This allows enough room to
write on the tabs and attach them.


Step 5: Fold Rectangles In Half.
Make sure you fold them horizontally
rather than vertically, so that they come
out 3/4" high when folded. Otherwise
you end up with very tall index tabs!


Step 6: Curve Corners.
I like to use a little corner punch.
It cuts easily through two layers of
standard cardstock. You want
to cut the corners along the fold.


Here are some little index tabs, all
ready to go. Notice that some are
curved around the corners and others
are square. Notice the little brown
tab off to the side -- remember how
yesterday I mentioned that these could
be manly? I think that one would do
nicely. Also a little more on the elegant side.


Step 7: Write On Label.
Take care to write on the upper
half (near the fold), as this is the
portion which will show once the
tab is attached to your journal.


Step 8: Apply Adhesive.
I prefer UHU Gluestick.
Any kind of glue, paste, gel medium,
or double-sided tape would work,
however. Apply to the entire interior.


Step 9: Attach To Page.
Here you want to put the front and
back of the index tab on either side
of a page and press firmly to attach.
Make sure the lower half of the tab
is on the paper, while the upper half
sticks up for easy viewing.


Step 10: Make A Bunch!
Here I have a collection of
index tabs in varying sizes so
I can easily grab one and use
it whenever the need arises!


Voila!